Overview This section provides you detailed understanding about Layout Designing functionalities of POS Designer. Making you familiar with the Layout screen, it covers all other important functionalities such as creating a new Layout, editing an existing Layout style, deleting a Layout, copying a Layout, viewing a Layout and Importing Exporting of the Layout.
Using the Layout feature, you can design a Layout by placing all the control and design panels to the canvas easily.
There are following topics covered in this section, click to explore: •Screen Introduction(Layout) •Creating a New Layout •Editing a Layout •Deleting a Layout •Copying a Layout •Viewing a Layout •Using POS Designer and Customization •Syncing Updated Layout with iVend Retail POS
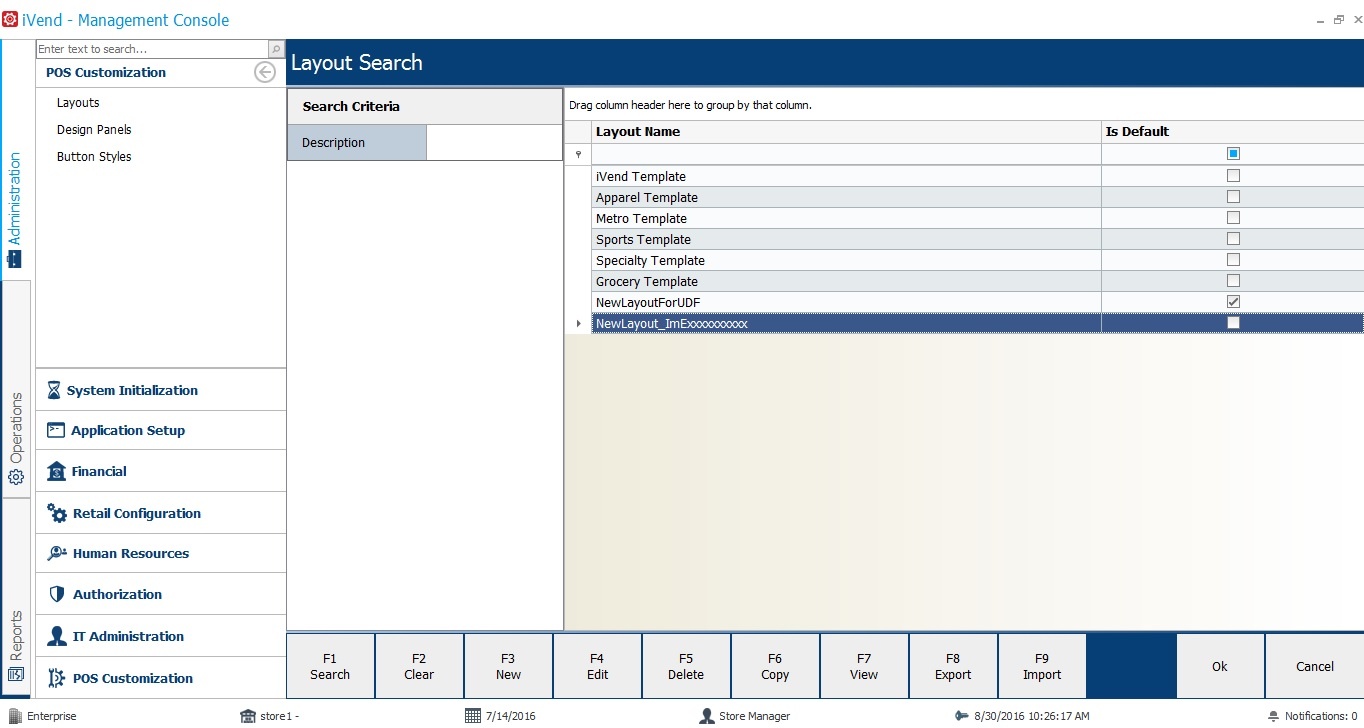
Screen Introduction (Layouts) To open the Layout Search screen, browse through Administration > POS Customization > Layout in iVend Management Console. This screen shows all the available layouts in the system. The screen has a button panel containing Search, Clear, New, Edit, Delete, Copy, View, Export and Import buttons to let users perform respective operation. Refer below illustration showing default Layout Search screen.
Creating a New Layout This topic describes about how to create a new layout.
The Layout Search Screen contains list of Layout from where you can simply select a Layout and edit it to save your own custom Design Layout or copy a selected layout to create a new layout containing properties of the source layout.
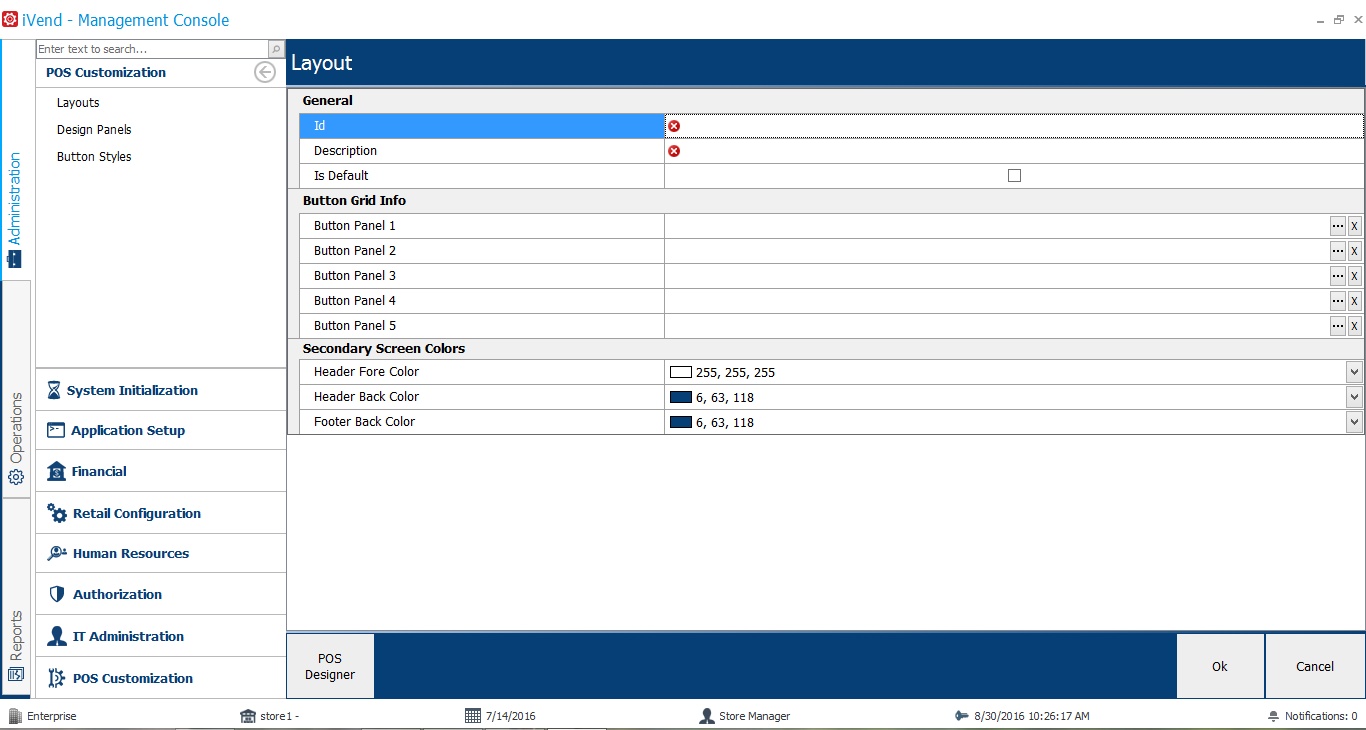
To create a new Layout Design: 1.On the Layout Search Screen, click the new button or press F3. It opens the Layout Screen containing General section along with Button Grid Info and Secondary Screen Colors. The screen has a button panel containing POS Designer button to let user go to canvas and design the Layout. 2.Refer the following mentions helping you to provide appropriate information in the form. oId: Enter an Id for the layout. This field accepts an alphanumeric value. oDescription: Enter a description for the layout. This field accepts an alphanumeric value. oIs Default: Select this checkbox to set it as default layout for Retail Config. oButton Panel 1: Click the Lookup oButton Panel 2, 3, 4, 5: Similarly you can select more Button Grid to associate with the Layout. oHeader Fore Color: Click to select the Header Fore Color for the Secondary Color. oHeader Back Color: Click to select the Header Back Color for the Secondary Color. oFooter Back Color: Click to select the Footer Back Color for the Secondary Color. After setting all Layout properties, click the POS Designer button to design the layout using all the Button Grid associated with it. Without going to POS Designer clicking the Ok button saves the layout with the default layout design.
Refer below illustration for the default layout screen.
Editing a Layout This section describes about how to edit an existing Layout. Editing a Layout allows you to edit the Layout by changing the button grid associated Layout, changing the Backcolor and forecolor for the header and footer for the secondary screen and change the layout design by going to canvas using POS designer button.
To edit a layout: 1.Browse through Administration > POS Customization > Layout to open the Layout Search screen. The Layout Search screen lists all available Layout Design available. 2.Select a Layout which you want to edit. 3.Click the Edit button or press F4. It opens the Layout screen with all fields preset. 4.Now, change the specific field or properties you want to change. 5.To Edit the Design of the layout click on POS designer button and go to Layout Design canvas. 6.Drag and Drop the control from place them accordingly. 7.Click the Ok button takes you back to the Layout Screen while Cancel click aborts the changes you have made. 8.Click the Ok button on Layout screen to save the changes made.
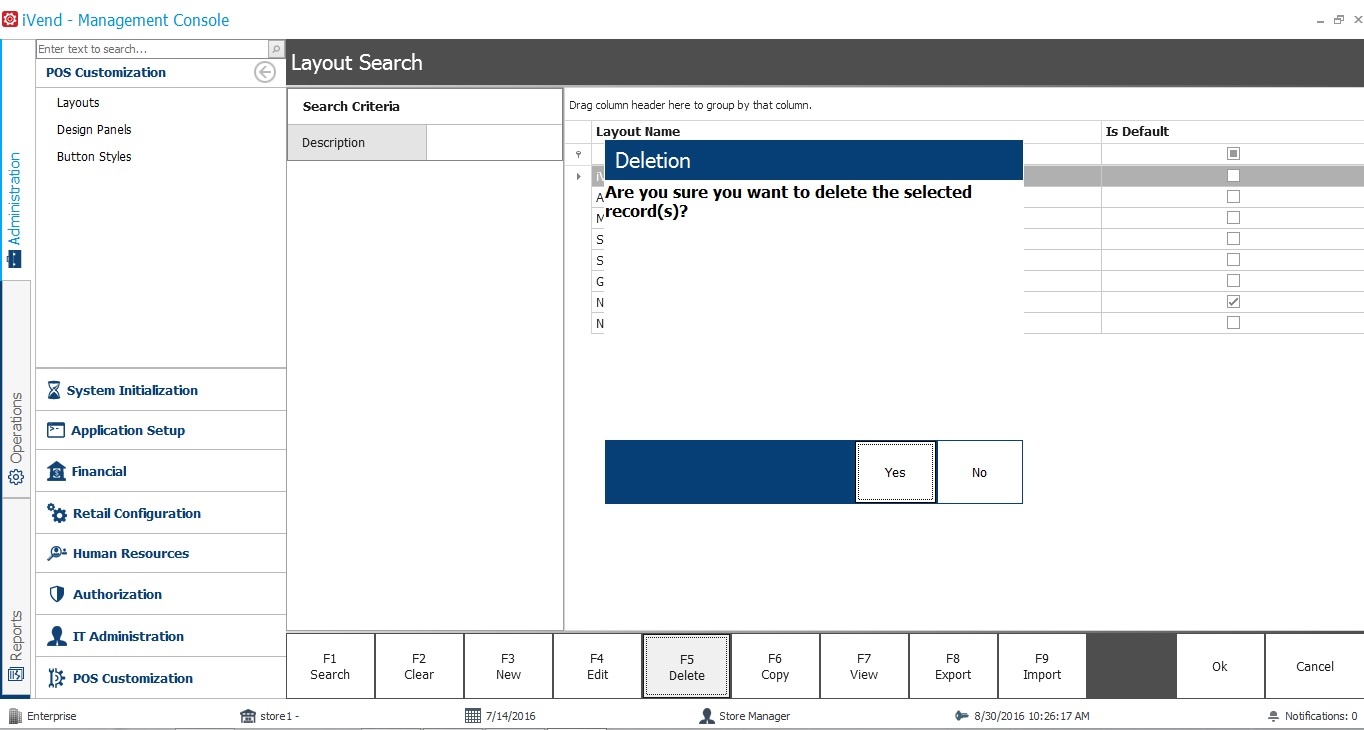
Deleting a Layout This section describes about how to delete a Layout from the Layout Search screen. To delete a layout: 1.Browse through Administration > POS Customization > Layout to open the Layout Search screen. The Layout Search screen lists all available Layouts. 2.Now select a Layout which you want to delete. 3.Then click the Delete button or press F5. Click A message appears asking for you conformation to delete the selected record. 4.Click the Yes button to delete the button. Note: •You cannot retrieve the Layout once you delete it. •The system does not allow you to delete the Layout, if it is being associated with the Layout. In case of user trying to delete the Design Panel that has been associated with the Layout, system prompts the error that Button Header cannot be deleted as it is used by the system.
Below is the message that appears on click the delete button.
Copying a Layout This section describes about how to copy a Layout. Copying a Layout helps you create another Layout Design where all the properties are preset according to the source Layout.
To copy a layout: 1.Browse through Administration > POS Customization > Layout to open the Layout Search screen. The Layout Search screen lists all available layouts. 2.Select a Layout which you want to copy. 3.Click the Copy button or press F6. It opens the Layout screen with all fields preset (except the Id) according to the source Layout. Note: In case of Copy, Button grid in the Layout from the source Layout is not copied, only the design of the layout is copied from the source layout. 4.Now, enter an Id in the Id field for the new Layout. 5.Associate all the button grid properties for the layout as per the requirement. 6.To Edit the Layout Design, go to Layout Designer canvas by clicking on POS Designer button. 7.Click the Customization Button to open the customization window. 8.Drag and Drop the controls to place on the canvas. 9.Clicking the Ok button saves your Layout and takes you to layout screen while Cancel aborts the changes. 10.Click the Ok button on Layout Screen to save the new Layout. You can now search for the newly created Layout on the Layout Search screen.
Viewing a Layout This section describes about the viewing a Layout. The View button opens the Layout in view only mode which does not let you make any change to its properties.
To view a layout: 1.Browse through Administration > POS Customization > Layouts to open the Layout Search screen. The Layout Search screen lists all available layouts. 2.Select a Layout which you want to view. 3.Click the View button or press F7. It opens the Layout screen in view only mode. 4.Click the Cancel button to close the screen and return to the Layout Search screen.
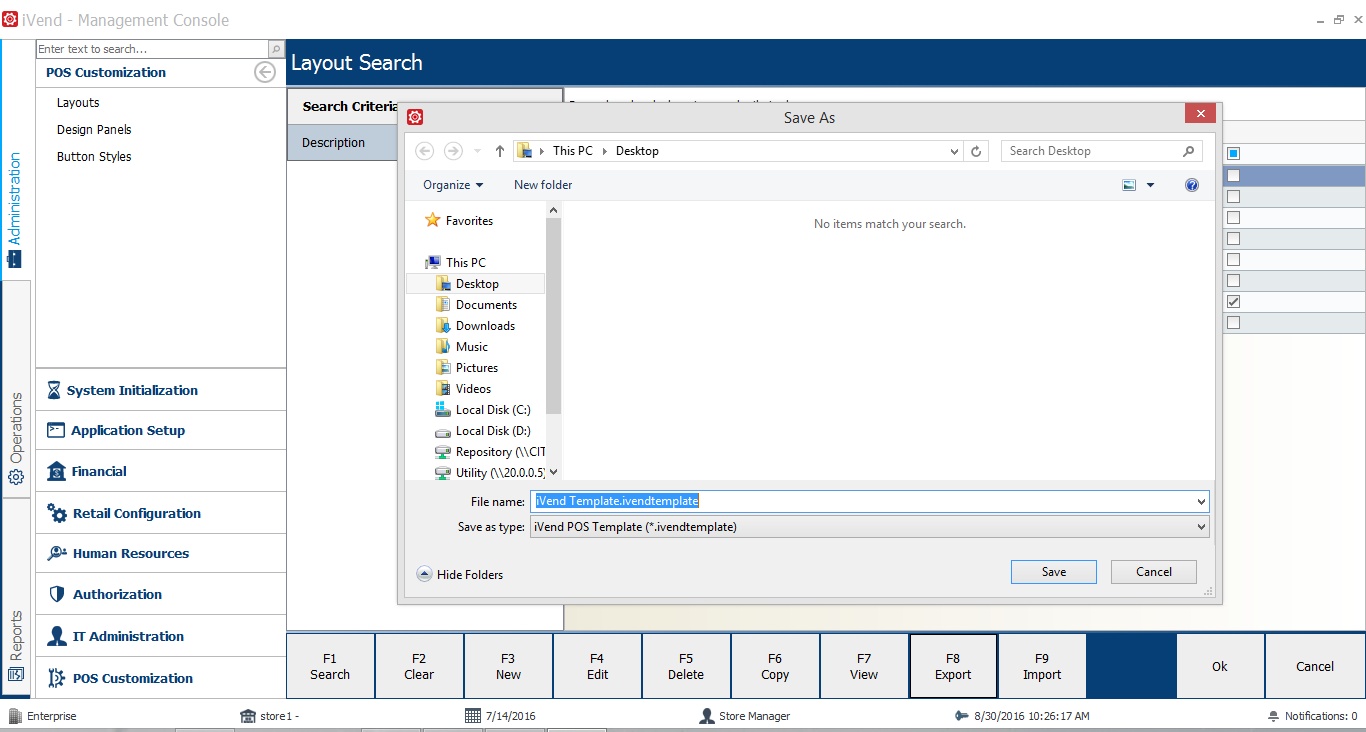
Exporting a Layout This section describes about the Exporting of a Layout. The Export button opens the browser window to select the location where the exported file get saved. The exported file is getting saved as (iVend POS Template) Ivend template format and the default name of the file is the name of the template.
To export a layout: 1.Browse through Administration > POS Customization > Layouts to open the Layout Search screen. The Layout Search screen lists all available layouts. 2.Select a Layout which you want to export. 3.Click the Export button or press F8. It opens the Browser Window to select the location where layout is to be saved. 4.Click the Save button to save the layout in iVend template format. 5.A message appears in the header that Selected layout has been exported successfully.
Below is the message that appears in when user clicks the Export button.
Importing a Layout This section describes about the Importing of a Layout. The Import button opens the browser window to select the Layout from any location to be imported. The Layout file should be in (iVend POS Template) iVend template format.
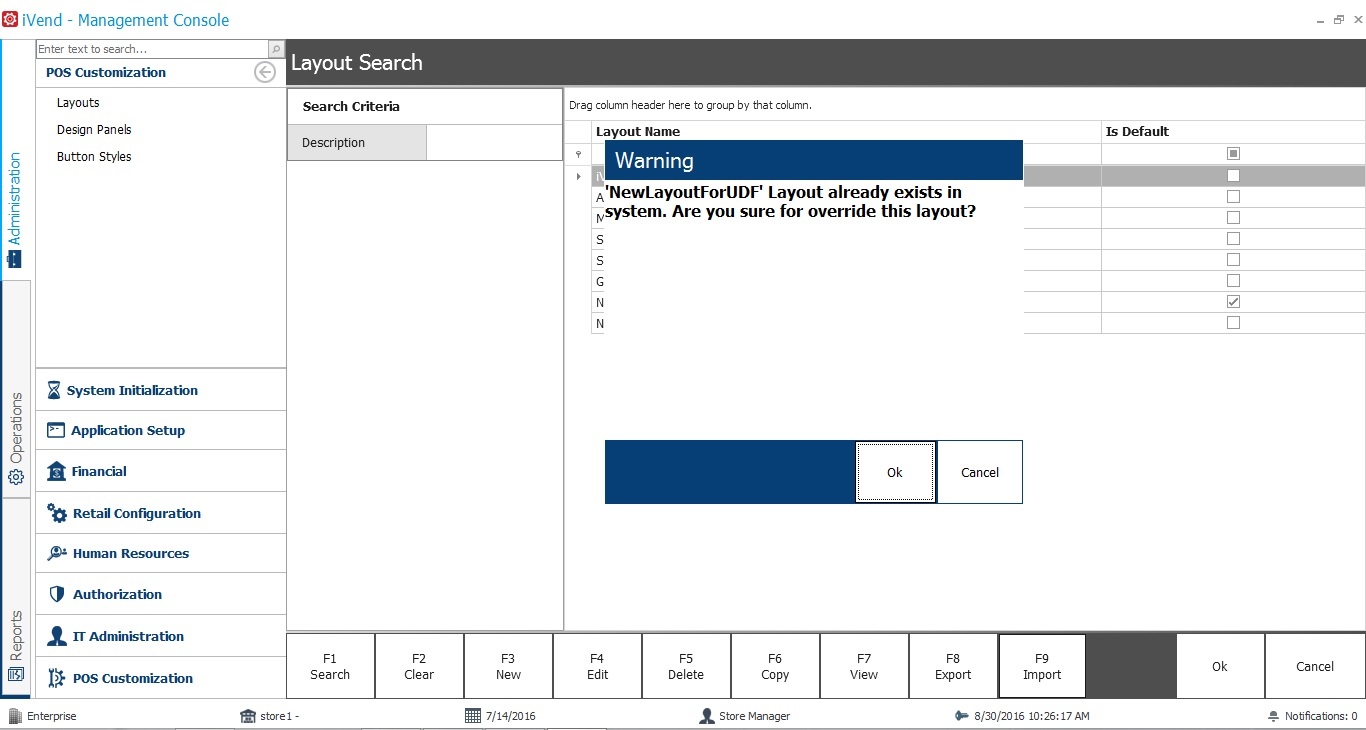
To Import a layout: 1.Browse through Administration > POS Customization > Layouts to open the Layout Search screen. The Layout Search screen lists all available Layouts. 2.Select a Layout which you want to import. 3.Click the Import button or press F9. It opens the Browser Window to select the Layout of iVend template format from any location. 4.Click the Open button to export the layout. 5.A message in the header appears that Layout imported successfully. 6.Layout export is now available in the Layout Search Screen. Note: The system prompts a message if you try to import a Layout which already exists, System compares for the layout on the basis of Id not on the basis of the name of the Layout.
Below is the message that appears in case of importing an existing Layout.
|

© CitiXsys 2019. All Rights Reserved.